Saved from the recycler...my new (new to me) Traeger.
A while back, I was driving home from work and saw what appeared to be a Traeger sitting on the curb. As I approached the grill, I noticed the word "FREE" was written in the dirt on the lid. I quickly pulled over, jumped out, and asked the owner why he was getting rid of it. He said it didn't work, he didn't have the time or energy to figure out why, and he'd just get another one. I looked it over real good and didn't notice anything really wrong with it...a little bit of surface rust at best, but that was about it. So, I loaded it in the back of my truck and drove it on home. That, in and of itself was not an easy task as my truck is lifted and this thing was hella-heavy!
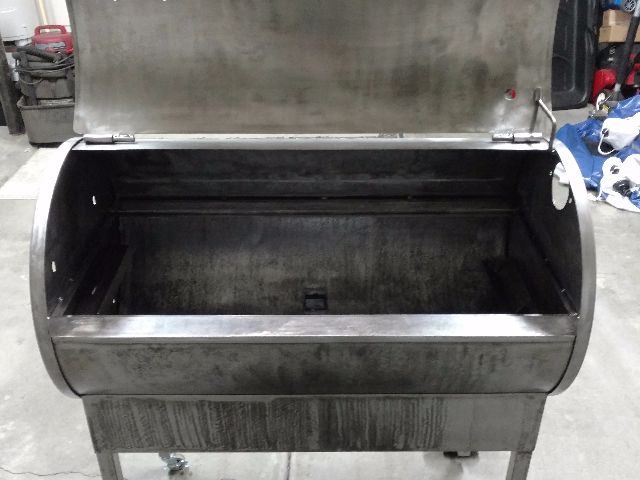
Once home, I inspected it from top to bottom and quickly found out why it wasn't working...the auger path was packed solid with pellets. It looked as though he had left it out in the rain for a considerable amount of time. Not only that, but after doing a bit of research, I found out this is one of the earlier models (BBQ 075), when they were still manufactured in Mt. Angel, Oregon.

Next, I began the work. I disassembled it, piece by piece and laid everything aside as my goal was to completely refurbish the grill. Once I got to the hopper unit, containing the auger, it took almost an entire day, slowly chipping away at the "pellet cement" with a very long screwdriver to finally free the auger. After I had freed it, I went to work on stripping everything down as well as I could with a drill and many wire wheels.


The strip-down process seemed to take forever. There was so much work to do. The chimney itself had over half an inch of creosode within. The main cooking chamber took weeks to strip down. Between work sessions (and many, many beers), I went and picked up all new stainless steel hardware (bolts, nuts, screws, etc) as well as a length of nomex for a better seal around the lid (after reading up on many forums about this).


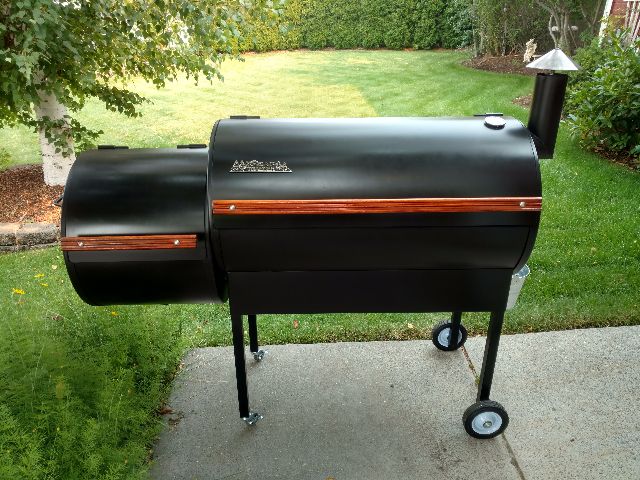
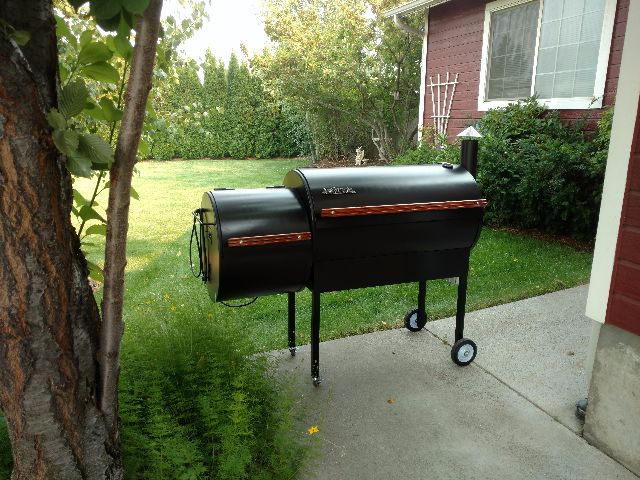
Now that it's complete, it looks like an entirely different creature...it looks brand, smokin' new!!! It was a whole crapload of work, but all the hours, paired with all the cuts, scrapes, and paint fumes were all worth it!


Here's everything I used to refurbish the Traeger along with the modifications and all the parts I replaced.
Qty Description
----- -------------------------
1 ea Drill
1 ea Drill bit (3/8")
2 ea Drill bit extension (12")
https://www.lowes.com/pd/IRWIN-SPEEDBOR-1-4-in-Hex-Quick-Connect-12-in-Drill-Bit-Extension/12219396 ea Wire wheel (soft)
https://www.lowes.com/pd/Kobalt-Wire-Brush-Set/501244351 ea Wire wheel (hard)
http://www.homedepot.com/p/Avanti-Pro-4-in-Drill-Mount-Quick-Strip-Wire-Brush-PWW040WIRD01G/2028309142 ea Wood dowel (square, 1" x 36")
https://www.lowes.com/pd/Madison-Mill-Square-Wood-Poplar-Dowel-Actual-36-in-L-x-1-in-dia/30415314 ea Metal strap (3/4" x 16")
http://www.homedepot.com/p/Simpson-Strong-Tie-ST2115-20-Gauge-16-5-16-in-Strap-Tie-ST2115/1003752492 ea Paintbrush
6 ea Sandpaper (2 x 60 grit, 2 x 100 grit, 2 x 150 grit)
1 ea Screwdriver (standard)
1 ea Screwdriver (philips)
8 oz Wood stain (golden oak)
https://www.lowes.com/pd/Minwax-Golden-Oak-Interior-Stain-Actual-Net-Contents-8-fl-oz/9999145216 oz Polyurethane
https://www.lowes.com/pd/Minwax-Gloss-Oil-Based-8-fl-oz-Polyurethane/9999136591 ea 1/2" x 15' Nomex gasket
https://www.amazon.com/gp/product/B00TAJW0QE/ref=oh_aui_detailpage_o01_s01?ie=UTF8&psc=11 ea RTV sealant (for around cooking chamber ends)
https://www.amazon.com/gp/product/B01MYXBV29/ref=oh_aui_detailpage_o01_s00?ie=UTF8&psc=16 ea High-heat 1,200 degree spray paint (semi-gloss black)
https://www.lowes.com/pd/Rust-Oleum-Specialty-Specialty-High-Heat-Black-Spray-Paint-Actual-Net-Contents-12-oz/37449052 ea Caster wheel with brake (2.5")
https://www.lowes.com/pd/Waxman-2-in-Rubber-Swivel-Caster/30269542 ea Steel wheel with bearing (6")
https://www.lowes.com/pd/Arnold-6-in-Wheel-for-Push-Lawn-Mower/500533151 ea Traeger logo lid badge (thanks to PH forum member)
1 ea Lid thermometer
https://www.amazon.com/gp/product/B01LZI4IA3/ref=oh_aui_detailpage_o02_s00?ie=UTF8&psc=11 ea Traeger drain bucket
https://www.amazon.com/gp/product/B01E9EZ0HK/ref=oh_aui_detailpage_o01_s01?ie=UTF8&psc=11 ea Bag of pellets
https://www.amazon.com/gp/product/B00HBCD5UM/ref=oh_aui_detailpage_o00_s00?ie=UTF8&psc=1- Disassembled all components
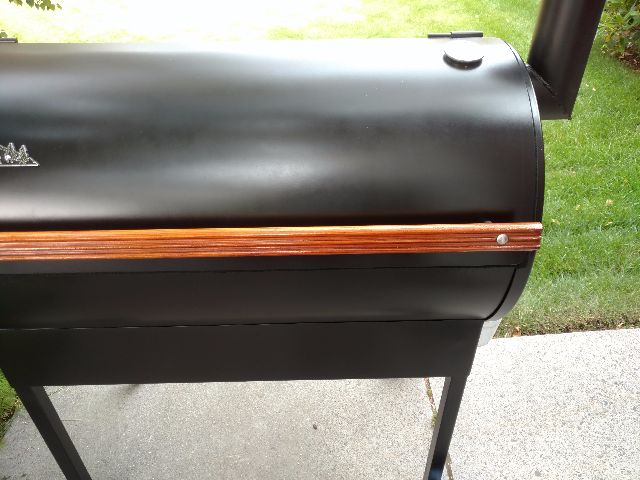
- Sanded both handles, stained (6 coats) and applied polyurethane (4 coats)
- Stripped paint and rust (interior and exterior) down to white steel
- Polished inside of auger path
- Added high-temp sealant around cooking chamber ends
- Cut left legs shorter to accommodate caster wheels
- Insert metal-strap covered wood dowels into left legs for caster wheels
- Replaced OEM plastic wheels with steel bearing wheels
- Re-painted (exterior only) with 1,200 degree high-heat paint
- Re-assembled
- Applied nomex seal around cooking chamber and hopper
My first meal on my new Traeger...


Smoked tri-tip roast with maple bourbon baked beans and four-cheese scalloped potatoes.
Now, it's full smoke ahead!!! I have used my new Traeger almost every day since that first meal. I love it so much, I keep it in the garage and only wheel it outside when it's time to cook. I even sold my old barbecue!
Now, after reading up so much on the Traeger, my current mods and next planned mods are..
- Auger governer removal (done)
- Lid thermometer (done)
- Fan switch
- Fire bricks
- Front folding shelf
- Side (right) shelf
- Hopper extension
- Lower leg-mounted shelf
- Enclosure (so I can keep it outside)